You Are Visitors

Monday, May 27, 2024

Home Project 1 (Part 3)

Connecting the unconnected:


(3.1) Connect and Label your wires

At this step, you will need to follow the wiring diagram to label the wires you laid for all fixtures and tie them properly after connection, the best way is with a marker and electrical tape to allow you to know which groups go to your overhead lighting, the outlets, or your light switch, etc. If you want your work to look better and make the cable easier to identify, adding the cable marker to distinguish the cables is a better idea. 

Cable markers are used for the identification and labelling of wires and cables. Properly labelling the cables for each electrical outlet and light switch used in your Home Project is crucial as it saves time when troubleshooting and money when moving, adding, or changing your home fixtures. It’s fairly cheap on price and will absolutely help you. It’s definitely not expensive to buy on the Taobao platform, the 10 rollers which cost me $25 numbering from 0 to 9, each roller is 5 feet long, can be combined into the required number per the circuit diagram to identify your cables. 


(3.2) Finalize your circuit diagram and check before the connection for your distributing cabinet 

Before the commencement of any wire connection, you’re required to have a circuit diagram you designed for your home project, and you need to countercheck each circuit from the diagram to ensure that all circuits are properly connected to all fixtures. 


In this part, I revised at least twice to my home project circuit diagram and finalized a four-page diagram for the purpose of troubleshooting. With a comprehensive wiring diagram, it is to not only solve the immediate problem but also strengthen the home fixtures against future issues.


(3.3) Cut to an appropriate size and connect to the cabinet’s ports and all fixtures

Once you reach your cable to the wire ports, you have to cut it to a neat and adequate length for your connection, leaving at least 12 inches of extra at first. The last thing I guess you want is to accidentally trim it too short, so you have to be careful not to cut it over. Otherwise, you may need to reroute the affected wire or connect it with a short wire to extend it. 

Try in the distributing cabinet to connect all the wires carefully as per the intended circuit diagrams and tie them properly.


(3.4) Install covers for the outlets, switches and fixtures

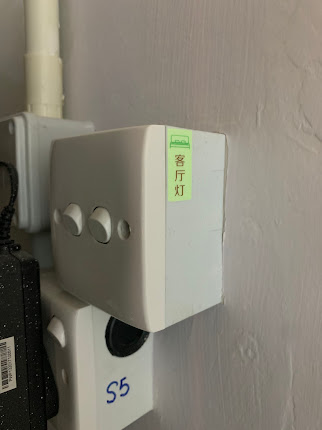
Install covers of the outlets, the Tee and elbow joints, and the junction boxes for your home project, make sure every bit of wiring is done before you cover the boxes. 


When you’re reading this paragraph, you might now catch the fun from the Home Project because your handy work would have come to life… if you were me, but you are not me unless you’re interested and willing to be a project player to tackle your own project. 


It might be challenging to do on your own, especially if this is your first time doing something like this Home Project. To be honest, wiring a house isn’t difficult if only you follow the proper guidance and do it with good preparation. If your confidence is not yet ready, don’t do it! Through the way you ask for some help to ensure everything is gone reasonably and safely, the helper who shall be a professional trained in such electrical installation, who can be a friend, or a classmate at the secondary school or college or a neighbor, to go work with you at the stages from planning to energization.   


(3.5)       Work Review

Working Time: 80 hours

Date of completion: 17 December 2023


 PS: Reminder Notes

1.   You should always turn the electricity off to the main switch and verify the power is off and not fed in before you begin to replace any fixtures and perform the connection of the wires.

2.     Proper safety precautions are essential whenever you work with electricity.

3.   Due to the potential risks involved when working with electrical circuits, it’s best to call in an electrician if you’re not confident in your abilities. Don’t do a DIYer if you don’t have knowledge about electrical installation, but a helper instead with a qualified worker.


To be cont'd


Home Project 1 (Part 4)

Connecting the unconnected:


I’m happy to talk about the total expenditure I spent on my mother’s home rewire project in this part, it is the final part (Part 4) of Home Project 1. My home project took place in three stages, Firstly, the existing breaker panel was removed and replaced with a newly purchased Hager brand panel, it was the first and crucial stage of my home project finished on 17 Oct 2023. Secondly, the installation and laying works were subsequently made on 15 November 2023 for the surface conduits, light switches, electrical outlets and wires that are all new for this project to replace the existing wires that were old, worn and corroded, even damaged by termite attack. Lastly on 17 December 2023 which was the day planned and worth celebrating for power to connect to the circuits successfully and making them live. The costs in total are $7205 and 1046 respectively for the materials being installed on a 3-bedroom house with a building area of about 700 square feet and the tools like a multi scanner (from Wah Fai Electronic), a V-H laser lever (from Taobao) and cable crimpers and so on.  


A three-page expenditure list is super helpful in that I can readily view the costs of how much my project spent on the material and tools required therein after finishing the home rewiring. You can make use of this list to both get a reference and preview which one of the materials will get the most coins from your budget plan. So obviously, electrical cables and the main power breaker panel become the first one and two highest prices on the list after you go through my expenditure list, they can be or over half of the total material cost. Therefore, you had better make two to three or more comparisons between different shops for a realistic idea of prices.   

A cost-effective buyer who can downgrade the complexity of the installation and purchase intermediate-priced products by giving up the impractical and non-crucial fixtures. Alternatively, ordering certain materials from the Taobao platform that are less important and won’t weaken your home project is a good option. Taobao is a fast direct online dealer in four to seven days you can obtain the materials ordered online previously. Of course, it gives a worthwhile buying price that tends to be the lowest compared to the physical shops.   


You can look out for the unit price of the accessories highlighted in the greenish rows on my expenditure list. It is fairly cheap (low cost but quality is acceptable) as long as you know how to find and choose on the online platform. The said accessories cost me a total of $207 (excluding delivery charge) for a full table amount, they were the elbow and tee joints, bushes, couplers, and water-resistant junction boxes with two dimensions (75 x 75 and 150 x 150) as well as a plastic cabinet which has been a distributing cabinet fixed in my mother’s home. 

It is recommended that the main ones of materials do not consider those with low prices, but in some reliable and well-known brands long-listed in the market, you do not require to have the best but have the intermediate-leveled ones, like Schneider and Hager, both are good enough to provide high grade of reliability and performance to your homes. Hager’s products are not expensive so that is why the main power breaker panel was chosen for the home wiring project. 


Reminder Note:

While DIY house rewiring is possible for experienced individuals, it’s essential to recognize your limitations. If you’re uncomfortable with any aspect of the project or if it involves complex electrical work, it’s wise to hire a licensed electrician. Safety should always be the top priority.


End 


Home Project 2

Following the huge success of Home Project 1, my mother’s house underwent a further update, known as Home Project 2, which saw the updating of the glass partitions with sliding door panels in the bedrooms in three stages of work.

Stage 1

First, the first stage began on January 14, 2024 with the demolition of the bedrooms. Six people were hired to carry out the work, one of whom was responsible for dismantling the old partitions and wardrobes with a crowbar, and the other two assisted in clearing the debris and gathering them in the service floor’s elevator lobby, the final three helped transport debris and waste planks from the service floor via the elevator to the main lobby. 


We paid them $2000 (not including tip) for 1.5 hours of work they did, and thought that the quote from this 6-person team was reasonable and relatively not expensive after a cost comparison to another two contractors' quotes for the same job were $4000 and $8000 respectively.


Work Review for Stage 1

Nos of Work Hours: 1.5 hours

Date of Completion: January 14, 2024

Labour Cost: $2000


Stage 2

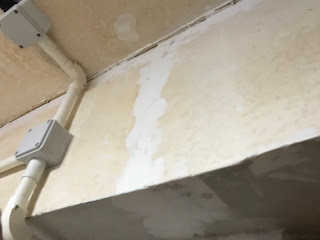
Secondly, post-treatment work needed to be completed within twelve days from the date of demolition of the first stage of the project. I only had two non-working days to make good the issues, such as scraping away all termite marks from the ceiling and walls and restoring the uneven surfaces in each bedroom. Indeed, I didn’t have extra time to do it other than Saturday the 20th and Sunday the 21st of the month as the installation work at Stage 3 then started on January 26, 2024.


Why is this stage important and a prerequisite? Because the treatment work allows the wall surfaces in contact with the outside and edge of the aluminum frame of the new partitions to be restored, and the surface pores to be filled through the wall treatment so that the subsequent Stage 3 process can proceed smoothly.
Sanding sponge 

Applied a coat of sealer and a coat of 2in1 primer paint on the required areas.


Work Review for Stage 2

Work Hours: 20 hours

Work items: Scrapped off flaking paint, Sanded the surface, Filled in gaps and cracks in the wall, Used sealer to prime the wall (one coat) and applied the primer paint (one coat)

Date of Completion: January 21, 2024 (final touch-up on January 25, 2024)

Material Cost: $883 (4L Dulux All in one Eco-sense primer, Water-based sealer, wall putty and paint tools)


Stage 3

Lastly, the installer started to fix the glass partitions and glass doors on the planned date which was January 26, 2024. Glass partitions are widely used to enhance the available space and create privacy in both offices and domestic flats. Therefore, if there is a need for a room, then glass partitions are enough to build up a room in the space. It was my mother's expectation to have glass partitions instead of wooden ones because of the termites they conveyed a bad memory to her to my family all before. We compared the glass partitions with the wooden partitions, and we found the glass partitions affordable and economical at the time we decided to use them, these partitions were also considered as the cheaper but more durable alternative to wooden walls, wooden walls will be infected but glass walls do not. Another benefit of glass partitions we then knew is that they can save energy (decrease the consumption of electricity) for your family and offer a natural light environment with a tendency to pass through the light in the daytime or when the room light is switched on. 


In the market, there are several types of glass partitions available, including single-glazed, double-glazed, acoustic laminated glass, and tempered (toughened) glass. The installer's salesman proposed choosing the tempered type as it has a higher toughness rating and is less susceptible to damage than other types. In addition, tempered glass is known as "Steel Glass" in the industry which is more durable and safer than traditional glass-made products.


If you want to decrease the consumption of electricity then glass partitions play an important role, these glass partitions have a tendency to pass through the light especially in the daytime, offering your family a beautiful natural light environment.


Work Review for Stage 3

Work Hours: 9.5 hours

Work items: Installation of glass partitions for bedrooms

Date of Completion: January 26, 2024 

Cost Spent: $30000 (Many reliable suppliers can provide beautiful customization options, including unique shapes, various thicknesses, versatile styles, and a lot more, depending on the thickness of the glass piece you needed)


Reminder Notes:

1.    Measure and plan

Before starting the installation process, it is crucial to measure the area on your own where you want to install the glass partition and then ask for at least 3 quotations from different installers. 

2. Requesting more information will help you to choose the correct size and type of glass partition for your space. 

3. Additionally, you should also plan the layout of the partition like mine, including the position and sliding direction of the doors. No order shall be placed before a site measurement is completed by the designated installer. 


End 


Home Project 3

Painting a house that holds unforgettable memories of where you lived as a child or where you still live today will be one of the most valuable updates you can make. A fresh coat of paint you’re about to paint can transform the look and feel of a room or the entire house. The obvious benefit you probably know of painting your home is the aesthetic improvement it provides.


January 26, 2024, the day was the completion of the glass partition installation, and it had only a couple of weeks left before the start of the Chinese New Year of 2024. To create a harmonious atmosphere for my mother’s house, a further home project named “Home Project 3” started on January 27. 


For this, my mother selected the Nippon Paint color OF8440 Iris Tip as the main color, applying for Room A, Room B and the walls of the Living Room of her house, also the Nippon Paint color NP OW1002P Snow White for the ceiling of the living room and Room C thereof, both are the odour-less 5-in-1 (Moisture-Proof) interior emulsion paints, the paints can reduce the humidity from walls and against mold growth. The color of Iris Tip tends to be a bit soft pink with purple mixed, sometimes I’m able to distinguish it from white color but I often do not because the color tone of the Iris Tip is fairly similar to that of Snow White.

OF8440 Iris Tip (left) and NP OW 1002P Snow White (Right)

Painting your home is a relatively simple yet effective way to improve its appearance, protect its surface, and create a more comfortable living environment. You don’t have to use the most expensive paints (have it made in a mid-price brand) so long as you choose the color you like or the elderly of your family likes. My suggestion is to go to a paint store and ask for a paint brochure that shows the variety of color samples you may choose, then stick them you like on your walls and see what color you like to paint in your home.


Also, remember that the actual color will be and must be a touch darker than the sample color(s) you found in the brochure. If you want to paint your home by yourself and feel that your house needs a bit more flare, you can also check out others in the brochure of Nippon Paint, or any of the other brands you recognize, like Dulux, etc.


Paint Works

1 week ago (It was the date of Feb 3, the first morning of the 7 days in advance of the Chinese New Year Holiday), there was a series of handy works before the start of my DIY painting work, including …I had to move the sofa and cupboard to the middle of the living room to prevent any obstruction during the processes and to hung up a protective sheet to the ceiling forming a sky cover to catch the old paint that was flaking off after scrapping. 

Using a paint scraper to scrape away old and flaking paint materials was a very pleasant process for me, scraping it off the ceiling surface, some in large chunks and some easily removed.

Screed up and Sand the surfaces after scraping

Applying a layer of wall putty on the scrapped parts is a prerequisite process before both a coat of sealer and new paints are applied that makes the parts even with the other areas of the walls and ceiling of the house.

Prime a coat of sealer and primer paint on the walls and ceiling

Using a water-based sealer is more cost-efficient as compared to painting your new coat of paint immediately, as it might require multiple coats to cover the old color. Sealer is another type of Primer Paint but is fairly cheap and can help primer paint adhere tightly to the wall surfaces. Additionally, its price is lower than the primer paint, approximately 1 to 3.8 ($120 to $460).


Apply the surface paint

It’s finally time to paint new colors (apply at least 2 coats of the new paint so that the color pay-off is better. Allow each coat of paint to dry thoroughly before applying the next layer. It’s best to wait at least 2 hours for the paint to dry). 


PS: It feels brand new to my mother!
End